This notebook helps you quickly train your Donkey car or autonomous car model.
Reference and improved the notebook of @sachindroid8, thanks to the previous generation!
- Efficiency
Using Colab requires a VPN, and also needs to upload data to Google, the upload time varies from person to person, I uploaded it for about 2-3 minutes, the rest is executing the code and training. The first execution of the code needs to understand what the principle is, and the subsequent execution basically does not take much time, but the training time using GPU, I have 6k images, training about 30-40 epochs early, the training time is less than 1 minute! Each Epoch only needs 1-2 seconds.
Then using my Macbook Pro training, because of the lack of GPU, each Epoch needs 30-50 seconds, training down, it takes about 40 minutes to 1 hour to complete.
- Convenience
If you don't have a VPN, of course, Colab is not a choice, I know Baidu also provides some limited free servers, which can be tested later, but with a VPN, Google Colab is the best choice. Below is how to start training
Open the Using Google_Colab to Donkey_Car
TensorFlow 2.x and Donkey Car 3.x still have compatibility issues, so it is not recommended to use them temporarily (2019.8.17)In [1]:
!pip install tensorflow-gpu==1.14.0
Collecting tensorflow-gpu==1.14.0
  Downloading https://files.pythonhosted.org/packages/76/04/43153bfdfcf6c9a4c38ecdb971ca9a75b9a791bb69a764d652c359aca504/tensorflow_gpu-1.14.0-cp36-cp36m-manylinux1_x86_64.whl (377.0MB)
     |████████████████████████████████| 377.0MB 86kB/s
Requirement already satisfied: grpcio>=1.8.6 in /usr/local/lib/python3.6/dist-packages (from tensorflow-gpu==1.14.0) (1.15.0)
Requirement already satisfied: absl-py>=0.7.0 in /usr/local/lib/python3.6/dist-packages (from tensorflow-gpu==1.14.0) (0.7.1)
Requirement already satisfied: tensorflow-estimator<1.15.0rc0,>=1.14.0rc0 in /usr/local/lib/python3.6/dist-packages (from tensorflow-gpu==1.14.0) (1.14.0)
Requirement already satisfied: wrapt>=1.11.1 in /usr/local/lib/python3.6/dist-packages (from tensorflow-gpu==1.14.0) (1.11.2)
Requirement already satisfied: termcolor>=1.1.0 in /usr/local/lib/python3.6/dist-packages (from tensorflow-gpu==1.14.0) (1.1.0)
Requirement already satisfied: astor>=0.6.0 in /usr/local/lib/python3.6/dist-packages (from tensorflow-gpu==1.14.0) (0.8.0)
Requirement already satisfied: keras-applications>=1.0.6 in /usr/local/lib/python3.6/dist-packages (from tensorflow-gpu==1.14.0) (1.0.8)
Requirement already satisfied: tensorboard<1.15.0,>=1.14.0 in /usr/local/lib/python3.6/dist-packages (from tensorflow-gpu==1.14.0) (1.14.0)
Requirement already satisfied: wheel>=0.26 in /usr/local/lib/python3.6/dist-packages (from tensorflow-gpu==1.14.0) (0.33.4)
Requirement already satisfied: protobuf>=3.6.1 in /usr/local/lib/python3.6/dist-packages (from tensorflow-gpu==1.14.0) (3.7.1)
Requirement already satisfied: six>=1.10.0 in /usr/local/lib/python3.6/dist-packages (from tensorflow-gpu==1.14.0) (1.12.0)
Requirement already satisfied: keras-preprocessing>=1.0.5 in /usr/local/lib/python3.6/dist-packages (from tensorflow-gpu==1.14.0) (1.1.0)
Requirement already satisfied: google-pasta>=0.1.6 in /usr/local/lib/python3.6/dist-packages (from tensorflow-gpu==1.14.0) (0.1.7)
Requirement already satisfied: gast>=0.2.0 in /usr/local/lib/python3.6/dist-packages (from tensorflow-gpu==1.14.0) (0.2.2)
Requirement already satisfied: numpy<2.0,>=1.14.5 in /usr/local/lib/python3.6/dist-packages (from tensorflow-gpu==1.14.0) (1.16.4)
Requirement already satisfied: h5py in /usr/local/lib/python3.6/dist-packages (from keras-applications>=1.0.6->tensorflow-gpu==1.14.0) (2.8.0)
Requirement already satisfied: markdown>=2.6.8 in /usr/local/lib/python3.6/dist-packages (from tensorboard<1.15.0,>=1.14.0->tensorflow-gpu==1.14.0) (3.1.1)
Requirement already satisfied: werkzeug>=0.11.15 in /usr/local/lib/python3.6/dist-packages (from tensorboard<1.15.0,>=1.14.0->tensorflow-gpu==1.14.0) (0.15.5)
Requirement already satisfied: setuptools>=41.0.0 in /usr/local/lib/python3.6/dist-packages (from tensorboard<1.15.0,>=1.14.0->tensorflow-gpu==1.14.0) (41.0.1)
Installing collected packages: tensorflow-gpu
Successfully installed tensorflow-gpu-1.14.0
If you see “Found GPU at: / device: GPU: 0”, then the GPU is working normally
If you don't see the above output, you need to check if the Runtime (Run Type) has selected the GPU hardware acceleratorIn [2]:
device_name = tf.test.gpu_device_name()
if device_name != '/device:GPU:0':
raise SystemError('GPU device not found')
print('Found GPU at: {}'.format(device_name))
Found GPU at: /device:GPU:0
In [3]:
!git clone https://github.com/autorope/donkeycar.git donkey
Cloning into 'donkey'...
remote: Enumerating objects: 120, done.
remote: Counting objects: 100% (120/120), done.
remote: Compressing objects: 100% (76/76), done.
remote: Total 10558 (delta 65), reused 73 (delta 31), pack-reused 10438
Receiving objects: 100% (10558/10558), 58.74 MiB | 46.70 MiB/s, done.
Resolving deltas: 100% (6528/6528), done.
In [4]:
Obtaining file:///content/donkey
Requirement already satisfied: numpy in /usr/local/lib/python3.6/dist-packages (from donkeycar==3.1.0) (1.16.4)
Requirement already satisfied: pillow in /usr/local/lib/python3.6/dist-packages (from donkeycar==3.1.0) (4.3.0)
Requirement already satisfied: docopt in /usr/local/lib/python3.6/dist-packages (from donkeycar==3.1.0) (0.6.2)
Requirement already satisfied: tornado in /usr/local/lib/python3.6/dist-packages (from donkeycar==3.1.0) (4.5.3)
Requirement already satisfied: requests in /usr/local/lib/python3.6/dist-packages (from donkeycar==3.1.0) (2.21.0)
Requirement already satisfied: h5py in /usr/local/lib/python3.6/dist-packages (from donkeycar==3.1.0) (2.8.0)
Requirement already satisfied: moviepy in /usr/local/lib/python3.6/dist-packages (from donkeycar==3.1.0) (0.2.3.5)
Requirement already satisfied: pandas in /usr/local/lib/python3.6/dist-packages (from donkeycar==3.1.0) (0.24.2)
Requirement already satisfied: PrettyTable in /usr/local/lib/python3.6/dist-packages (from donkeycar==3.1.0) (0.7.2)
Collecting paho-mqtt (from donkeycar==3.1.0)
  Downloading https://files.pythonhosted.org/packages/25/63/db25e62979c2a716a74950c9ed658dce431b5cb01fde29eb6cba9489a904/paho-mqtt-1.4.0.tar.gz (88kB)
     |████████████████████████████████| 92kB 4.2MB/s
Requirement already satisfied: olefile in /usr/local/lib/python3.6/dist-packages (from pillow->donkeycar==3.1.0) (0.46)
Requirement already satisfied: urllib3<1.25,>=1.21.1 in /usr/local/lib/python3.6/dist-packages (from requests->donkeycar==3.1.0) (1.24.3)
Requirement already satisfied: certifi>=2017.4.17 in /usr/local/lib/python3.6/dist-packages (from requests->donkeycar==3.1.0) (2019.6.16)
Requirement already satisfied: chardet<3.1.0,>=3.0.2 in /usr/local/lib/python3.6/dist-packages (from requests->donkeycar==3.1.0) (3.0.4)
Requirement already satisfied: idna<2.9,>=2.5 in /usr/local/lib/python3.6/dist-packages (from requests->donkeycar==3.1.0) (2.8)
Requirement already satisfied: six in /usr/local/lib/python3.6/dist-packages (from h5py->donkeycar==3.1.0) (1.12.0)
Requirement already satisfied: decorator<5.0,>=4.0.2 in /usr/local/lib/python3.6/dist-packages (from moviepy->donkeycar==3.1.0) (4.4.0)
Requirement already satisfied: tqdm<5.0,>=4.11.2 in /usr/local/lib/python3.6/dist-packages (from moviepy->donkeycar==3.1.0) (4.28.1)
Requirement already satisfied: imageio<3.0,>=2.1.2 in /usr/local/lib/python3.6/dist-packages (from moviepy->donkeycar==3.1.0) (2.4.1)
Requirement already satisfied: pytz>=2011k in /usr/local/lib/python3.6/dist-packages (from pandas->donkeycar==3.1.0) (2018.9)
Requirement already satisfied: python-dateutil>=2.5.0 in /usr/local/lib/python3.6/dist-packages (from pandas->donkeycar==3.1.0) (2.5.3)
Building wheels for collected packages: paho-mqtt
  Building wheel for paho-mqtt (setup.py) ... done
  Created wheel for paho-mqtt: filename=paho_mqtt-1.4.0-cp36-none-any.whl size=48333 sha256=9a67d0c95fae2b9495c20980895d9569ef53859cbc22bb57fc2466d7a581af7b
  Stored in directory: /root/.cache/pip/wheels/82/e5/de/d90d0f397648a1b58ffeea1b5742ac8c77f71fd43b550fa5a5
Successfully built paho-mqtt
Installing collected packages: paho-mqtt, donkeycar
  Running setup.py develop for donkeycar
Successfully installed donkeycar paho-mqtt-1.4.0
I used mycar as the project name, you can change it, but you need to modify the code after renamingIn [5]:
!donkey createcar --path /content/mycar
using donkey v3.1.0 ...
Creating car folder: /content/mycar
making dir  /content/mycar
Creating data & model folders.
making dir  /content/mycar/models
making dir  /content/mycar/data
making dir  /content/mycar/logs
Copying car application template: complete
Copying car config defaults. Adjust these before starting your car.
Copying train script. Adjust these before starting your car.
Copying my car config overrides
Donkey setup complete.
Now you need to package the data directory that you collected from pi, save it as data.zip.
Run the following command on the pi data directory:
$ zip -r data.zip tub_3_19-08-17/
Then copy it back to your computer, ready to upload to Colab
Run the following code, you will see an upload button, click to upload the data.zip you just packagedIn [7]:
from google.colab import files
if(os.path.exists("/content/data.zip")):
os.remove("/content/data.zip")
if(os.path.exists("/content/mycar/data/data.zip")):
os.remove("/content/mycar/data/data.zip")
uploaded = files.upload()
WORK_FOLDER = "/content/mycar/data/"
if(os.path.exists(WORK_FOLDER) == False):
!mv /content/data.zip /content/mycar/data/
You need to ensure that the content/mycar/data directory has a tub directory, and the directory contains images and corresponding json files
data.zip is not neededIn [0]:
!rm /content/mycar/data/data.zip
In [21]:
!python /content/mycar/manage.py train --model /content/mycar/models/mypilot.h5
using donkey v3.1.0 ...
loading config file: /content/mycar/config.py
loading personal config over-rides

config loaded
WARNING: Logging before flag parsing goes to stderr.
W0818 04:53:15.944086 140399927523200 deprecation_wrapper.py:119] From /content/donkey/donkeycar/parts/keras.py:18: The name tf.ConfigProto is deprecated. Please use tf.compat.v1.ConfigProto instead.

W0818 04:53:15.944333 140399927523200 deprecation_wrapper.py:119] From /content/donkey/donkeycar/parts/keras.py:18: The name tf.Session is deprecated. Please use tf.compat.v1.Session instead.

2019-08-18 04:53:15.954857: I tensorflow/core/platform/cpu_feature_guard.cc:142] Your CPU supports instructions that this TensorFlow binary was not compiled to use: AVX2 FMA
2019-08-18 04:53:15.959505: I tensorflow/stream_executor/platform/default/dso_loader.cc:42] Successfully opened dynamic library libcuda.so.1
2019-08-18 04:53:16.083690: I tensorflow/stream_executor/cuda/cuda_gpu_executor.cc:1005] successful NUMA node read from SysFS had negative value (-1), but there must be at least one NUMA node, so returning NUMA node zero
2019-08-18 04:53:16.084227: I tensorflow/compiler/xla/service/service.cc:168] XLA service 0x2455100 executing computations on platform CUDA. Devices:
2019-08-18 04:53:16.084262: I tensorflow/compiler/xla/service/service.cc:175]   StreamExecutor device (0): Tesla T4, Compute Capability 7.5
2019-08-18 04:53:16.086194: I tensorflow/core/platform/profile_utils/cpu_utils.cc:94] CPU Frequency: 2300000000 Hz
2019-08-18 04:53:16.086460: I tensorflow/compiler/xla/service/service.cc:168] XLA service 0x65e6380 executing computations on platform Host. Devices:
2019-08-18 04:53:16.086508: I tensorflow/compiler/xla/service/service.cc:175]   StreamExecutor device (0): <undefined>, <undefined>
2019-08-18 04:53:16.086686: I tensorflow/stream_executor/cuda/cuda_gpu_executor.cc:1005] successful NUMA node read from SysFS had negative value (-1), but there must be at least one NUMA node, so returning NUMA node zero
2019-08-18 04:53:16.087039: I tensorflow/core/common_runtime/gpu/gpu_device.cc:1640] Found device 0 with properties:
name: Tesla T4 major: 7 minor: 5 memoryClockRate(GHz): 1.59
pciBusID: 0000:00:04.0
2019-08-18 04:53:16.087321: I tensorflow/stream_executor/platform/default/dso_loader.cc:42] Successfully opened dynamic library libcudart.so.10.0
2019-08-18 04:53:16.088548: I tensorflow/stream_executor/platform/default/dso_loader.cc:42] Successfully opened dynamic library libcublas.so.10.0
2019-08-18 04:53:16.089621: I tensorflow/stream_executor/platform/default/dso_loader.cc:42] Successfully opened dynamic library libcufft.so.10.0
2019-08-18 04:53:16.089935: I tensorflow/stream_executor/platform/default/dso_loader.cc:42] Successfully opened dynamic library libcurand.so.10.0
2019-08-18 04:53:16.091399: I tensorflow/stream_executor/platform/default/dso_loader.cc:42] Successfully opened dynamic library libcusolver.so.10.0
2019-08-18 04:53:16.092394: I tensorflow/stream_executor/platform/default/dso_loader.cc:42] Successfully opened dynamic library libcusparse.so.10.0
2019-08-18 04:53:16.095470: I tensorflow/stream_executor/platform/default/dso_loader.cc:42] Successfully opened dynamic library libcudnn.so.7
2019-08-18 04:53:16.095606: I tensorflow/stream_executor/cuda/cuda_gpu_executor.cc:1005] successful NUMA node read from SysFS had negative value (-1), but there must be at least one NUMA node, so returning NUMA node zero
2019-08-18 04:53:16.096009: I tensorflow/stream_executor/cuda/cuda_gpu_executor.cc:1005] successful NUMA node read from SysFS had negative value (-1), but there must be at least one NUMA node, so returning NUMA node zero
2019-08-18 04:53:16.096350: I tensorflow/core/common_runtime/gpu/gpu_device.cc:1763] Adding visible gpu devices: 0
2019-08-18 04:53:16.096401: I tensorflow/stream_executor/platform/default/dso_loader.cc:42] Successfully opened dynamic library libcudart.so.10.0
2019-08-18 04:53:16.097166: I tensorflow/core/common_runtime/gpu/gpu_device.cc:1181] Device interconnect StreamExecutor with strength 1 edge matrix:
2019-08-18 04:53:16.097190: I tensorflow/core/common_runtime/gpu/gpu_device.cc:1187]      0
2019-08-18 04:53:16.097201: I tensorflow/core/common_runtime/gpu/gpu_device.cc:1200] 0:   N
2019-08-18 04:53:16.097482: I tensorflow/stream_executor/cuda/cuda_gpu_executor.cc:1005] successful NUMA node read from SysFS had negative value (-1), but there must be at least one NUMA node, so returning NUMA node zero
2019-08-18 04:53:16.097878: I tensorflow/stream_executor/cuda/cuda_gpu_executor.cc:1005] successful NUMA node read from SysFS had negative value (-1), but there must be at least one NUMA node, so returning NUMA node zero
2019-08-18 04:53:16.098226: I tensorflow/core/common_runtime/gpu/gpu_device.cc:1326] Created TensorFlow device (/job:localhost/replica:0/task:0/device:GPU:0 with 14089 MB memory) -> physical GPU (device: 0, name: Tesla T4, pci bus id: 0000:00:04.0, compute capability: 7.5)
"get_model_by_type" model Type is: linear
W0818 04:53:16.444941 140399927523200 deprecation.py:506] From /usr/local/lib/python3.6/dist-packages/tensorflow/python/ops/init_ops.py:1251: calling VarianceScaling.__init__ (from tensorflow.python.ops.init_ops) with dtype is deprecated and will be removed in a future version.
Instructions for updating:
Call initializer instance with the dtype argument instead of passing it to the constructor
training with model type <class 'donkeycar.parts.keras.KerasLinear'>
Model: "model"
__________________________________________________________________________________________________
Layer (type)                    Output Shape         Param #     Connected to
==================================================================================================
img_in (InputLayer)             [(None, 120, 160, 3) 0
__________________________________________________________________________________________________
conv2d_1 (Conv2D)               (None, 58, 78, 24)   1824        img_in[0][0]
__________________________________________________________________________________________________
dropout (Dropout)               (None, 58, 78, 24)   0           conv2d_1[0][0]
__________________________________________________________________________________________________
conv2d_2 (Conv2D)               (None, 27, 37, 32)   19232       dropout[0][0]
__________________________________________________________________________________________________
dropout_1 (Dropout)             (None, 27, 37, 32)   0           conv2d_2[0][0]
__________________________________________________________________________________________________
conv2d_3 (Conv2D)               (None, 12, 17, 64)   51264       dropout_1[0][0]
__________________________________________________________________________________________________
dropout_2 (Dropout)             (None, 12, 17, 64)   0           conv2d_3[0][0]
__________________________________________________________________________________________________
conv2d_4 (Conv2D)               (None, 10, 15, 64)   36928       dropout_2[0][0]
__________________________________________________________________________________________________
dropout_3 (Dropout)             (None, 10, 15, 64)   0           conv2d_4[0][0]
__________________________________________________________________________________________________
conv2d_5 (Conv2D)               (None, 8, 13, 64)    36928       dropout_3[0][0]
__________________________________________________________________________________________________
dropout_4 (Dropout)             (None, 8, 13, 64)    0           conv2d_5[0][0]
__________________________________________________________________________________________________
flattened (Flatten)             (None, 6656)         0           dropout_4[0][0]
__________________________________________________________________________________________________
dense (Dense)                   (None, 100)          665700      flattened[0][0]
__________________________________________________________________________________________________
dropout_5 (Dropout)             (None, 100)          0           dense[0][0]
__________________________________________________________________________________________________
dense_1 (Dense)                 (None, 50)           5050        dropout_5[0][0]
__________________________________________________________________________________________________
dropout_6 (Dropout)             (None, 50)           0           dense_1[0][0]
__________________________________________________________________________________________________
n_outputs0 (Dense)              (None, 1)            51          dropout_6[0][0]
__________________________________________________________________________________________________
n_outputs1 (Dense)              (None, 1)            51          dropout_6[0][0]
==================================================================================================
Total params: 817,028
Trainable params: 817,028
Non-trainable params: 0
__________________________________________________________________________________________________
None
found 0 pickles writing json records and images in tub /content/mycar/data/tub_3_19-08-17
/content/mycar/data/tub_3_19-08-17
collating 5799 records ...
train: 4639, val: 1160
total records: 5799
steps_per_epoch 36
Epoch 1/100
2019-08-18 04:53:19.663907: I tensorflow/stream_executor/platform/default/dso_loader.cc:42] Successfully opened dynamic library libcublas.so.10.0
2019-08-18 04:53:19.984999: I tensorflow/stream_executor/platform/default/dso_loader.cc:42] Successfully opened dynamic library libcudnn.so.7
35/36 [============================>.] - ETA: 0s - loss: 0.1681 - n_outputs0_loss: 0.1555 - n_outputs1_loss: 0.0126
Epoch 00001: val_loss improved from inf to 0.14482, saving model to /content/mycar/models/mypilot.h5
36/36 [==============================] - 8s 213ms/step - loss: 0.1677 - n_outputs0_loss: 0.1553 - n_outputs1_loss: 0.0124 - val_loss: 0.1448 - val_n_outputs0_loss: 0.1409 - val_n_outputs1_loss: 0.0039
Epoch 2/100
34/36 [===========================>..] - ETA: 0s - loss: 0.1278 - n_outputs0_loss: 0.1234 - n_outputs1_loss: 0.0044
Epoch 00002: val_loss improved from 0.14482 to 0.08814, saving model to /content/mycar/models/mypilot.h5
36/36 [==============================] - 2s 53ms/step - loss: 0.1257 - n_outputs0_loss: 0.1214 - n_outputs1_loss: 0.0043 - val_loss: 0.0881 - val_n_outputs0_loss: 0.0870 - val_n_outputs1_loss: 0.0012
Epoch 3/100
35/36 [============================>.] - ETA: 0s - loss: 0.0943 - n_outputs0_loss: 0.0910 - n_outputs1_loss: 0.0033
Epoch 00003: val_loss improved from 0.08814 to 0.07490, saving model to /content/mycar/models/mypilot.h5
36/36 [==============================] - 2s 52ms/step - loss: 0.0938 - n_outputs0_loss: 0.0905 - n_outputs1_loss: 0.0033 - val_loss: 0.0749 - val_n_outputs0_loss: 0.0738 - val_n_outputs1_loss: 0.0011
Epoch 4/100
35/36 [============================>.] - ETA: 0s - loss: 0.0840 - n_outputs0_loss: 0.0813 - n_outputs1_loss: 0.0027
Epoch 00004: val_loss improved from 0.07490 to 0.07108, saving model to /content/mycar/models/mypilot.h5
36/36 [==============================] - 2s 51ms/step - loss: 0.0835 - n_outputs0_loss: 0.0808 - n_outputs1_loss: 0.0027 - val_loss: 0.0711 - val_n_outputs0_loss: 0.0702 - val_n_outputs1_loss: 8.9668e-04
Epoch 5/100
35/36 [============================>.] - ETA: 0s - loss: 0.0767 - n_outputs0_loss: 0.0741 - n_outputs1_loss: 0.0026
Epoch 00005: val_loss did not improve from 0.07108
36/36 [==============================] - 2s 50ms/step - loss: 0.0765 - n_outputs0_loss: 0.0739 - n_outputs1_loss: 0.0026 - val_loss: 0.0722 - val_n_outputs0_loss: 0.0717 - val_n_outputs1_loss: 5.4629e-04
Epoch 6/100
35/36 [============================>.] - ETA: 0s - loss: 0.0750 - n_outputs0_loss: 0.0727 - n_outputs1_loss: 0.0023
Epoch 00006: val_loss improved from 0.07108 to 0.06483, saving model to /content/mycar/models/mypilot.h5
36/36 [==============================] - 2s 52ms/step - loss: 0.0749 - n_outputs0_loss: 0.0725 - n_outputs1_loss: 0.0024 - val_loss: 0.0648 - val_n_outputs0_loss: 0.0641 - val_n_outputs1_loss: 7.5336e-04
Epoch 7/100
35/36 [============================>.] - ETA: 0s - loss: 0.0711 - n_outputs0_loss: 0.0689 - n_outputs1_loss: 0.0022
Epoch 00007: val_loss improved from 0.06483 to 0.06324, saving model to /content/mycar/models/mypilot.h5
36/36 [==============================] - 2s 52ms/step - loss: 0.0711 - n_outputs0_loss: 0.0689 - n_outputs1_loss: 0.0021 - val_loss: 0.0632 - val_n_outputs0_loss: 0.0626 - val_n_outputs1_loss: 5.9058e-04
Epoch 8/100
35/36 [============================>.] - ETA: 0s - loss: 0.0693 - n_outputs0_loss: 0.0675 - n_outputs1_loss: 0.0018
Epoch 00008: val_loss did not improve from 0.06324
36/36 [==============================] - 2s 51ms/step - loss: 0.0690 - n_outputs0_loss: 0.0672 - n_outputs1_loss: 0.0018 - val_loss: 0.0644 - val_n_outputs0_loss: 0.0637 - val_n_outputs1_loss: 7.8261e-04
Epoch 9/100
35/36 [============================>.] - ETA: 0s - loss: 0.0693 - n_outputs0_loss: 0.0675 - n_outputs1_loss: 0.0018
Epoch 00009: val_loss did not improve from 0.06324
36/36 [==============================] - 2s 50ms/step - loss: 0.0690 - n_outputs0_loss: 0.0672 - n_outputs1_loss: 0.0018 - val_loss: 0.0653 - val_n_outputs0_loss: 0.0646 - val_n_outputs1_loss: 6.6657e-04
Epoch 10/100
34/36 [===========================>..] - ETA: 0s - loss: 0.0651 - n_outputs0_loss: 0.0633 - n_outputs1_loss: 0.0018
Epoch 00010: val_loss did not improve from 0.06324
36/36 [==============================] - 2s 51ms/step - loss: 0.0657 - n_outputs0_loss: 0.0639 - n_outputs1_loss: 0.0018 - val_loss: 0.0699 - val_n_outputs0_loss: 0.0692 - val_n_outputs1_loss: 6.9729e-04
Epoch 11/100
35/36 [============================>.] - ETA: 0s - loss: 0.0630 - n_outputs0_loss: 0.0612 - n_outputs1_loss: 0.0018
Epoch 00011: val_loss did not improve from 0.06324
36/36 [==============================] - 2s 51ms/step - loss: 0.0630 - n_outputs0_loss: 0.0612 - n_outputs1_loss: 0.0018 - val_loss: 0.0633 - val_n_outputs0_loss: 0.0619 - val_n_outputs1_loss: 0.0014
Epoch 12/100
35/36 [============================>.] - ETA: 0s - loss: 0.0643 - n_outputs0_loss: 0.0626 - n_outputs1_loss: 0.0016
Epoch 00012: val_loss improved from 0.06324 to 0.06034, saving model to /content/mycar/models/mypilot.h5
36/36 [==============================] - 2s 52ms/step - loss: 0.0644 - n_outputs0_loss: 0.0628 - n_outputs1_loss: 0.0017 - val_loss: 0.0603 - val_n_outputs0_loss: 0.0598 - val_n_outputs1_loss: 4.9525e-04
Epoch 13/100
35/36 [============================>.] - ETA: 0s - loss: 0.0611 - n_outputs0_loss: 0.0597 - n_outputs1_loss: 0.0014
Epoch 00013: val_loss improved from 0.06034 to 0.05636, saving model to /content/mycar/models/mypilot.h5
36/36 [==============================] - 2s 52ms/step - loss: 0.0613 - n_outputs0_loss: 0.0599 - n_outputs1_loss: 0.0014 - val_loss: 0.0564 - val_n_outputs0_loss: 0.0557 - val_n_outputs1_loss: 6.3083e-04
Epoch 14/100
34/36 [===========================>..] - ETA: 0s - loss: 0.0593 - n_outputs0_loss: 0.0580 - n_outputs1_loss: 0.0013
Epoch 00014: val_loss did not improve from 0.05636
36/36 [==============================] - 2s 51ms/step - loss: 0.0590 - n_outputs0_loss: 0.0577 - n_outputs1_loss: 0.0013 - val_loss: 0.0580 - val_n_outputs0_loss: 0.0575 - val_n_outputs1_loss: 5.4033e-04
Epoch 15/100
34/36 [===========================>..] - ETA: 0s - loss: 0.0552 - n_outputs0_loss: 0.0540 - n_outputs1_loss: 0.0012
Epoch 00015: val_loss did not improve from 0.05636
36/36 [==============================] - 2s 51ms/step - loss: 0.0555 - n_outputs0_loss: 0.0542 - n_outputs1_loss: 0.0012 - val_loss: 0.0565 - val_n_outputs0_loss: 0.0559 - val_n_outputs1_loss: 5.6679e-04
Epoch 16/100
35/36 [============================>.] - ETA: 0s - loss: 0.0538 - n_outputs0_loss: 0.0527 - n_outputs1_loss: 0.0012
Epoch 00016: val_loss did not improve from 0.05636
36/36 [==============================] - 2s 50ms/step - loss: 0.0538 - n_outputs0_loss: 0.0526 - n_outputs1_loss: 0.0012 - val_loss: 0.0624 - val_n_outputs0_loss: 0.0619 - val_n_outputs1_loss: 5.0014e-04
Epoch 17/100
35/36 [============================>.] - ETA: 0s - loss: 0.0536 - n_outputs0_loss: 0.0525 - n_outputs1_loss: 0.0011
Epoch 00017: val_loss improved from 0.05636 to 0.05615, saving model to /content/mycar/models/mypilot.h5
36/36 [==============================] - 2s 53ms/step - loss: 0.0534 - n_outputs0_loss: 0.0523 - n_outputs1_loss: 0.0011 - val_loss: 0.0561 - val_n_outputs0_loss: 0.0556 - val_n_outputs1_loss: 5.2067e-04
Epoch 18/100
35/36 [============================>.] - ETA: 0s - loss: 0.0502 - n_outputs0_loss: 0.0492 - n_outputs1_loss: 0.0011
Epoch 00018: val_loss improved from 0.05615 to 0.05594, saving model to /content/mycar/models/mypilot.h5
36/36 [==============================] - 2s 52ms/step - loss: 0.0501 - n_outputs0_loss: 0.0490 - n_outputs1_loss: 0.0011 - val_loss: 0.0559 - val_n_outputs0_loss: 0.0555 - val_n_outputs1_loss: 4.4089e-04
Epoch 00018: early stopping
Training completed in 0:00:40.


----------- Best Eval Loss :0.055939 ---------
<Figure size 640x480 with 1 Axes>
In [26]:
import matplotlib.pyplot as plt
list_of_png = glob.glob('/content/mycar/models/*png')
latest_png = max(list_of_png, key=os.path.getctime)
image = cv2.imread(latest_png)
/content/mycar/models/mypilot.h5_loss_acc_0.055939.png
Out[26]:
<matplotlib.image.AxesImage at 0x7f867c896be0>
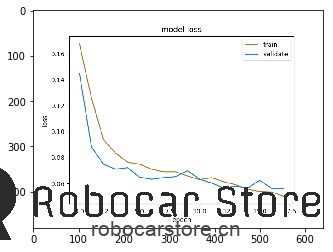
Once the model is trained, you can find the trained model in the mycar/models directory
1. Download the mypilot file to your PC or Mac
- Copy the model from your PC or Mac to your pi
Enjoy!
