Donkey Car Detailed Explanation (2) – Raspberry Pi Installation
### Donkey Car Detailed Explanation (2) – Raspberry Pi Installation

Donkey Car Detailed Explanation (2) – Raspberry Pi Installation
Now the official Donkey Car is no longer provided with a lazy person’s version, so this time we will share the process of installing Donkey Car on a Raspberry Pi (Raspberry Pi 3 B+).
Reference: http://docs.donkeycar.com/guide/robot_sbc/setup_raspberry_pi/
Environment
The official recommendation is to use Raspian Lite(Stretch) (352MB). However, I used the desktop version, as follows:
Raspberry Pi OS:
– Raspbian Buster with desktop
Version:July 2019
Release date:2019-07-10
Kernel version:4.19
Download Url:
https://www.raspberrypi.org/downloads/raspbian/
How to flash install Raspberry Pi, here is no more.
Assume you have already installed the Raspberry Pi system and can connect to the network, you can choose to connect to the display directly (this example’s operation mode), or remotely SSH. You like it.
Open the command line, let’s start!
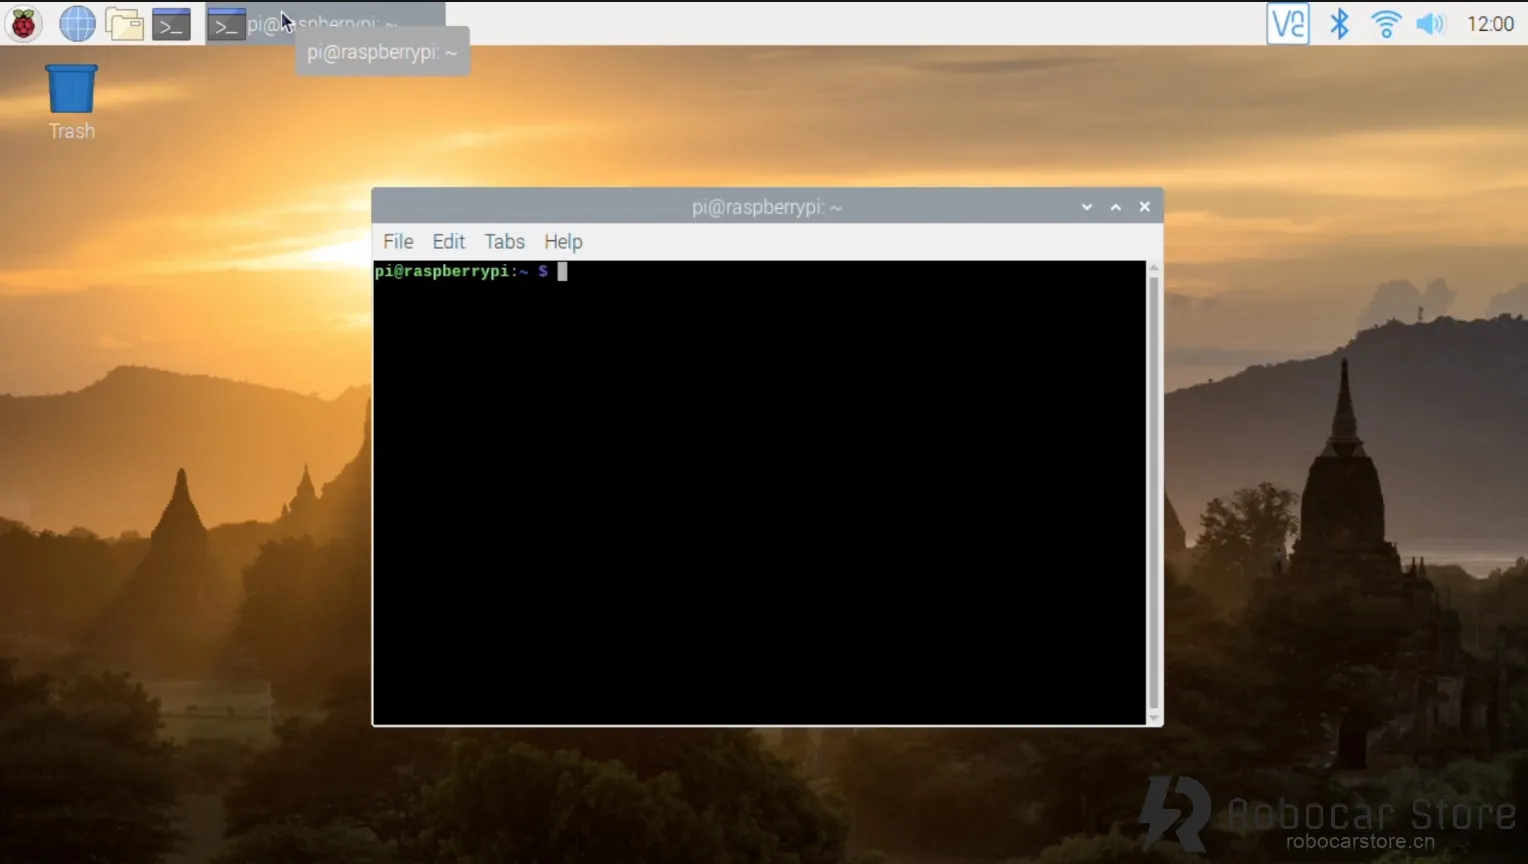
Start Installation
1,Update your system before installation
To update your system, enter the following command:
Updating the system takes a long time and may need to be repeated multiple times to complete. Please be patient.
2,Configure Raspberry Pi to enable camera, I2C, expand file system
To open the Raspberry Pi configuration dialog, enter the following command in the command line:
① Enable I2C
05 Interfacing Options -> P5 I2C ->「Yes」
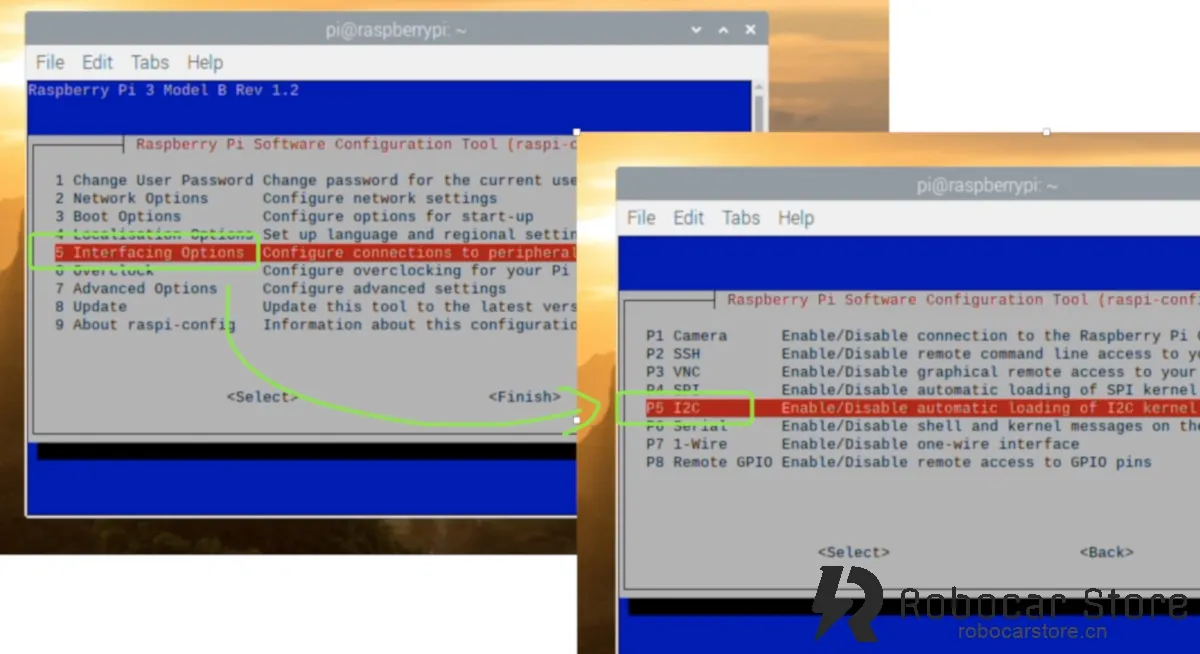
② Enable Camera:
05 Interfacing Options -> P1 Camera -> 「Yes」
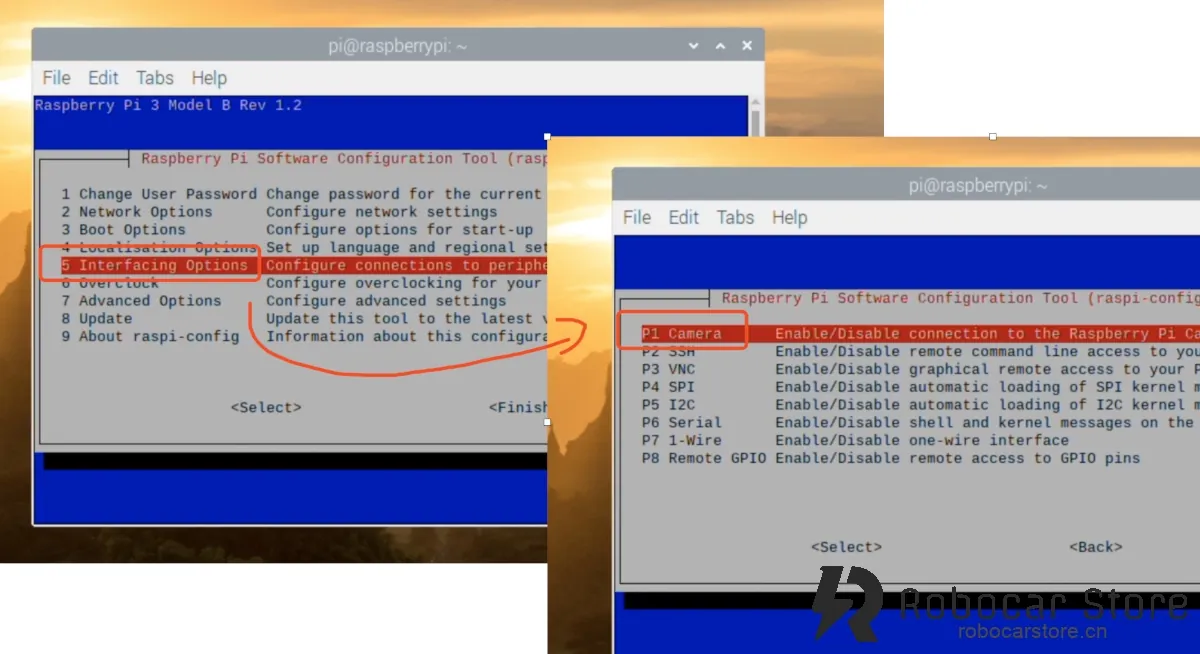
③ Expand File System
7 Advanced Options -> A1 Exapand Filesystem
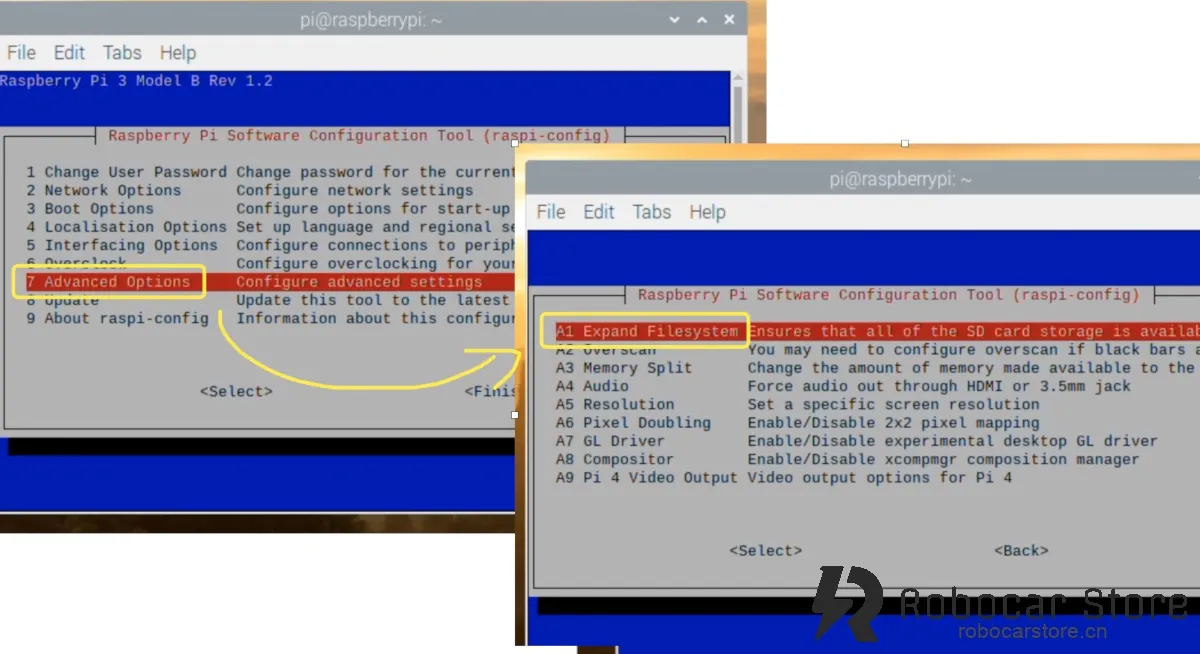
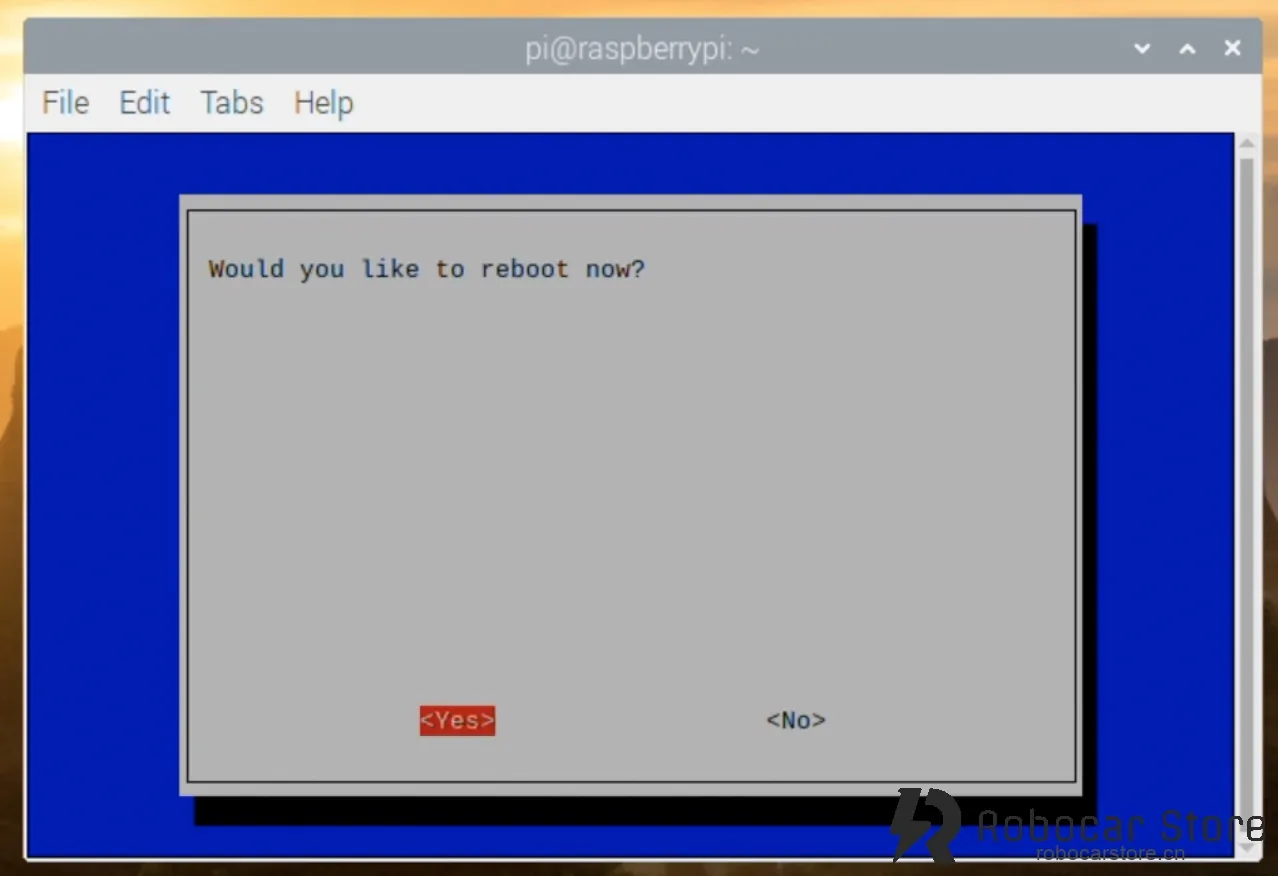
Set it up, then exit the configuration dialog, it will prompt whether to restart now, select 「Yes」 to restart the system.
3,Install the dependencies required for Donkey Car
Enter the following command in the command line:
sudo apt-get install -y build-essential python3 python3-dev python3-pip python3-virtualenv python3-numpy python3-picamera python3-pandas python3-rpi.gpio i2c-tools avahi-utils joystick libopenjp2-7-dev libtiff5-dev gfortran libatlas-base-dev libopenblas-dev libhdf5-serial-dev git
After a long wait, it will be installed, if an error occurs, please run it again.
(If the problem is still not resolved, please share the problem you encountered in the comments section, and post your system version, as much information as possible, so we can help you.)
4,Install OpenCV dependencies (optional)
This step is optional, you can skip it if you don’t use the OpenCV feature.
If you still want to install it, enter the following command in the command line:
sudo apt-get install libilmbase-dev libopenexr-dev libgstreamer1.0-dev libjasper-dev libwebp-dev libatlas-base-dev libavcodec-dev libavformat-dev libswscale-dev libqtgui4 libqt4-test
5,Install Virtual Environment
Enter the following command in the command line:
python3 -m virtualenv -p python3 env —system-site-packages
echo “source env/bin/activate” >> ~/.bashrc
After running the above commands, the command line will have a (env) prefix, indicating that we are operating in an environment called env.
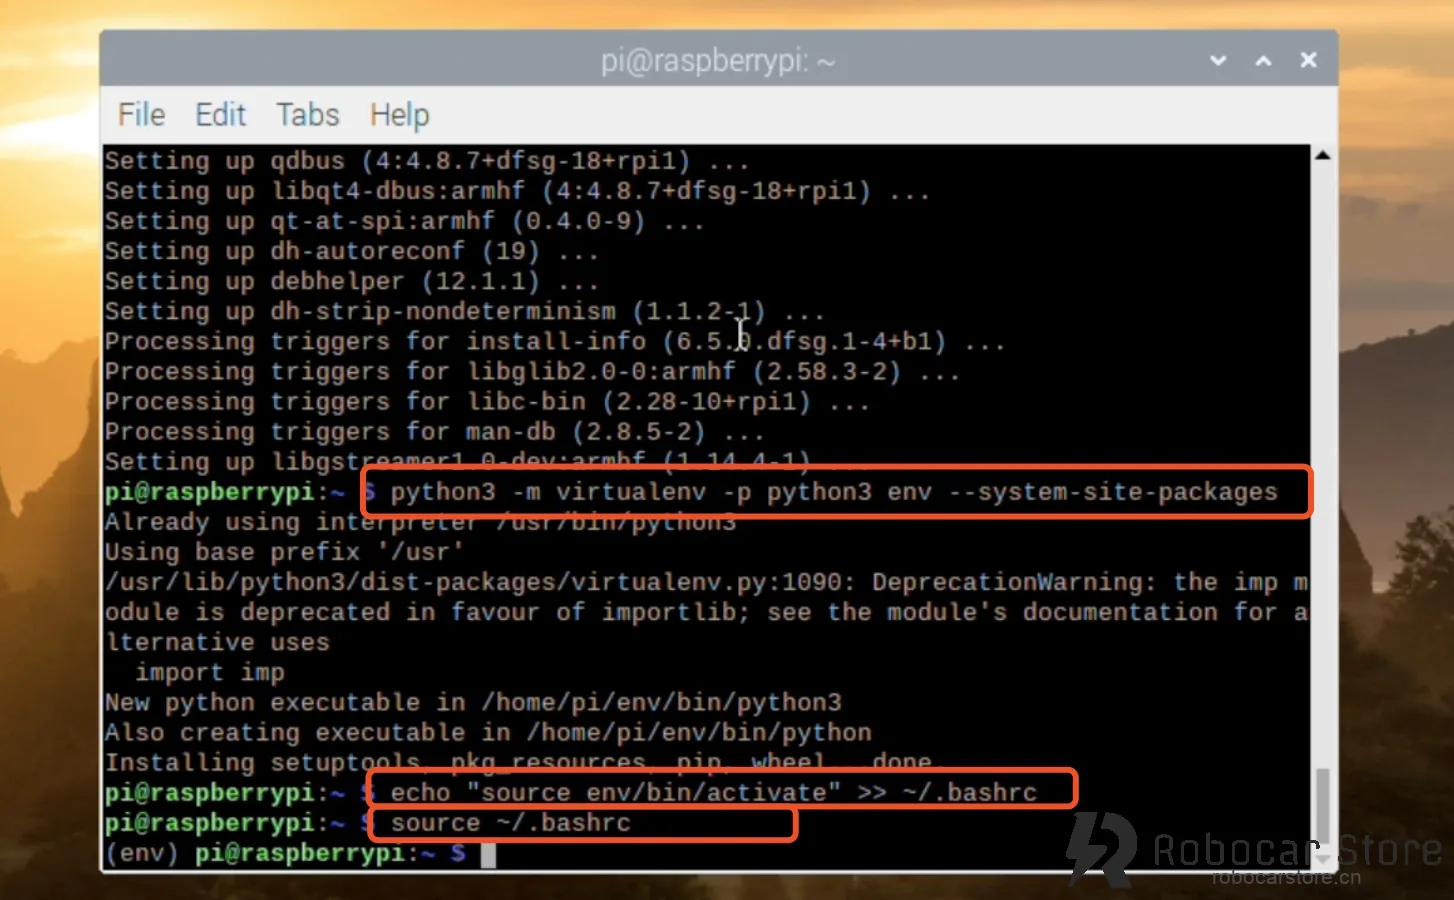
The purpose of the virtual environment is to avoid errors in other projects when updating a dependency or automatically clearing a dependency on the Raspberry Pi running multiple projects.
Now, every time the Raspberry Pi starts, it will automatically enter the env virtual environment. If you want to exit, enter the command line: deactivate .
6,Install Donkey Car’s Python Code
Create Directory, and Enter the Directory
In the user directory, create a folder named projects (directory), and enter the folder, enter the following command:
Note: Directly enter the user directory, just enter the command line: cd , press Enter.
Clone the entire Donkey car project from GitHub
Enter the following command:
git clone https://github.com/autorope/donkeycar
Then, start a long wait, because the speed of github in China is not fast, please be patient, if it doesn’t work, run it again.
Note: If you are familiar with command line instructions, you can use the scp command to download some software projects after packaging, and upload them to the current directory of the Raspberry Pi. For specific usage, please search for it yourself.
When git clone (clone) is complete, we use the following command to operate:
pip install tensorflow==1.13.1
Note:
– When running pip install -e .[pi] installation, if an error occurs, you can try to run it again.
– When running pip install tensorflow==1.13.1 , it may prompt that the downloaded file’s hash code is incorrect, causing it to be unable to download. You can manually use the wget command to download it according to the error prompt, download it, and then use pip install 「downloaded file name」 to install it.
Verify Tensorflow Installation Success
Enter the following command to enter the Python interactive programming mode:
Enter the following code to check:
print(tensorflow.__version__)
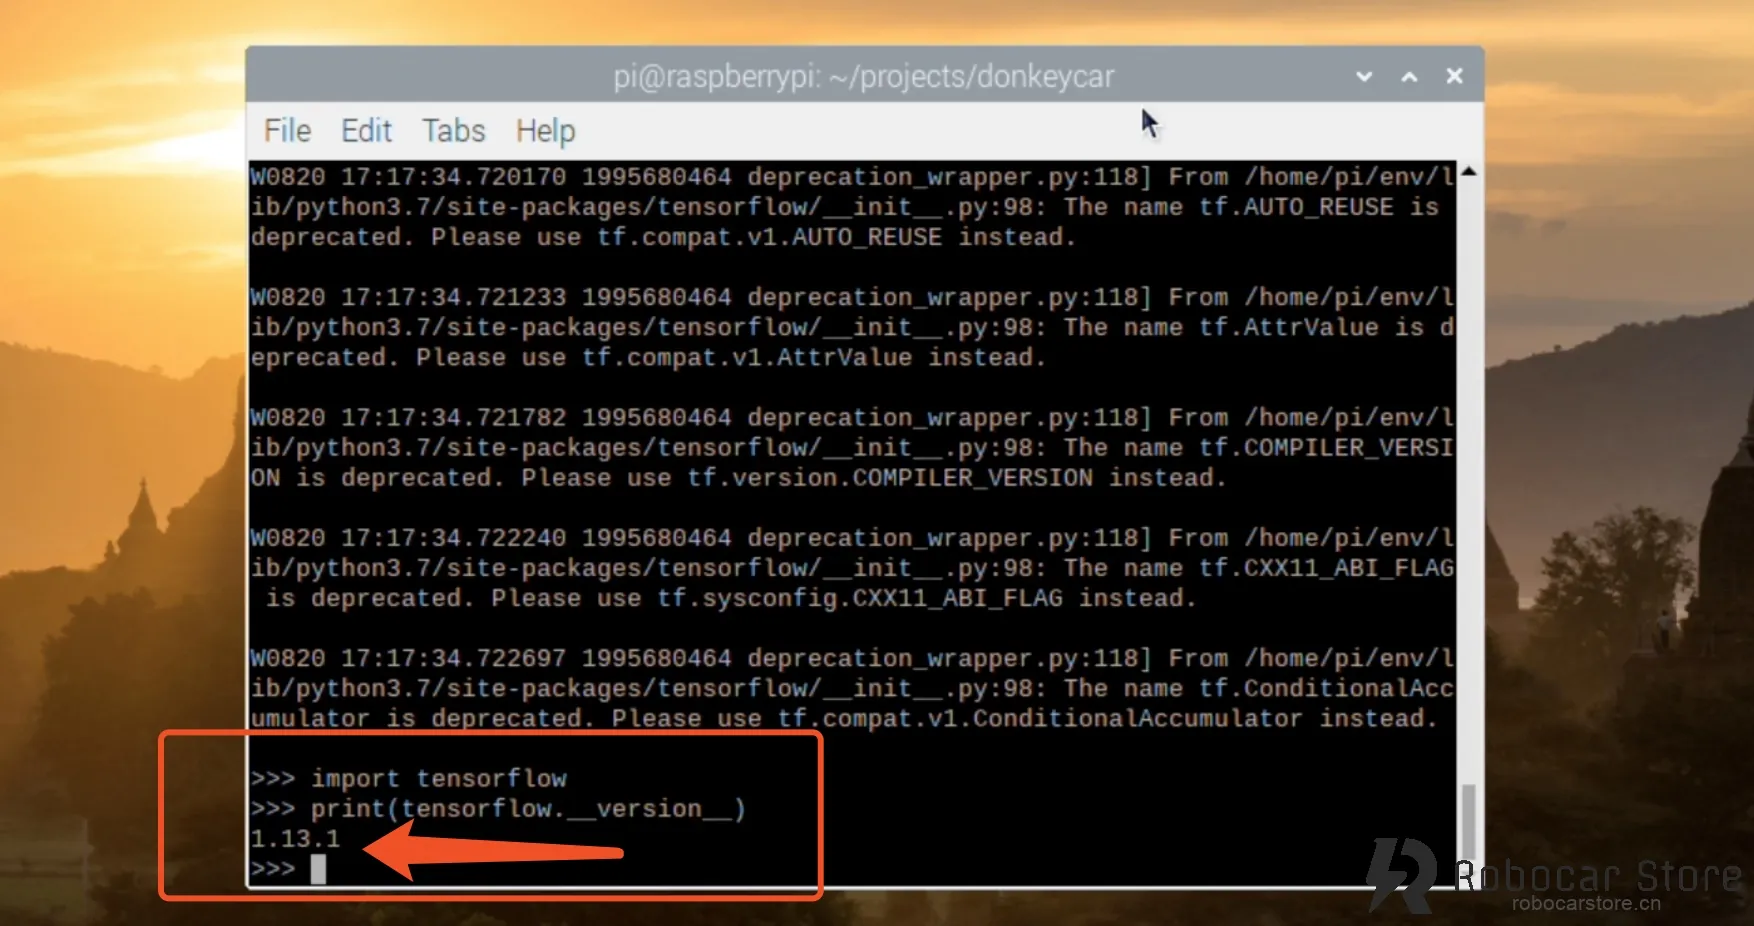
When you see the version 1.13.1, it proves that you have successfully installed Tensorflow.
Note: Python will have some prompts when loading tensorflow for the first time, please don’t worry, this is not an error prompt.
7,Install Python’s OpenCV (optional)
Install OpenCV
This is also not required to be installed, if you don’t use the OpenCV feature.
But if you still want to install it, please enter the following command:
pip install opencv-python
Verify Whether OpenCV Installation Success
Enter the following code to enter the Python interactive programming mode:
import cv2
print(cv2.__version__)