开发环境搭建:Ubuntu + ROS2 + Isaac Sim完整指南
手把手教你搭建Embodied AI开发环境,包括Ubuntu系统配置、ROS2安装、Isaac Sim部署和常见问题解决。
开发环境 Ubuntu ROS2 Isaac Sim 安装教程
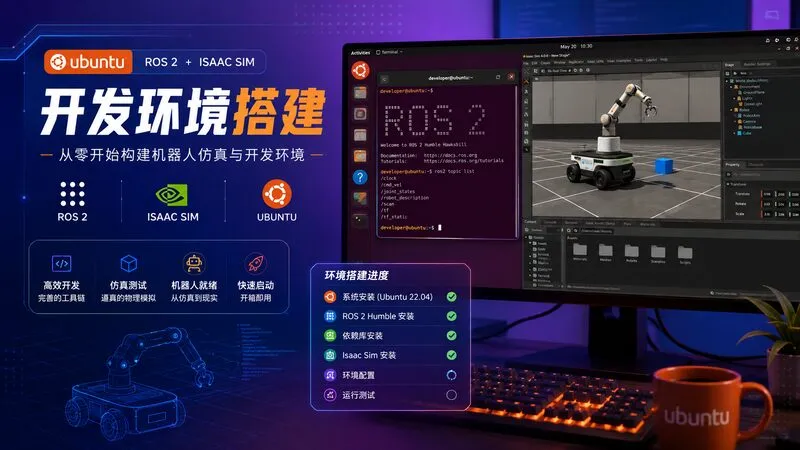
开发环境搭建:Ubuntu + ROS2 + Isaac Sim完整指南
工欲善其事,必先利其器。本文带你从零搭建一个完整的 Embodied AI 开发环境。我们不仅会介绍安装步骤,还会分享实际开发中的最佳实践、性能优化技巧和常见问题解决方案。无论你是初学者还是有经验的开发者,这篇文章都能帮助你建立一个稳定、高效的开发环境。
硬件要求
配置对比
| 组件 | 最低配置 | 推荐配置 | 理想配置 |
|---|---|---|---|
| CPU | Intel i5 / AMD R5 | Intel i7 / AMD R7 | Intel i9 / AMD R9 |
| 内存 | 16GB | 32GB | 64GB+ |
| GPU | RTX 2060 (6GB) | RTX 3080 (10GB) | RTX 4090 (24GB) |
| 存储 | 100GB SSD | 500GB NVMe SSD | 1TB NVMe SSD |
| 系统 | Ubuntu 22.04 | Ubuntu 22.04 LTS | Ubuntu 22.04 LTS |
详细说明
CPU:
- Isaac Sim 需要支持 AVX2 指令集的 CPU
- 多核心有助于并行仿真
- 推荐 6 核心以上
内存:
- Isaac Sim 运行时至少需要 16GB
- 加载大型场景可能需要 32GB+
- 建议使用 DDR4 或 DDR5
GPU:
- 必须 NVIDIA RTX 显卡(支持光线追踪)
- 显存至少 6GB,推荐 10GB+
- 驱动版本 >= 525.60
- 不支持 GTX 系列
存储:
- Isaac Sim 本身需要约 20GB
- 项目数据和缓存可能占用 50-100GB
- 强烈建议使用 NVMe SSD(SATA SSD 也可以,但 HDD 太慢)
推荐硬件配置
入门级(约 8000 元):
- CPU:Intel i5-12400 / AMD R5 5600X
- 内存:16GB DDR4 3200MHz
- GPU:RTX 3060 12GB
- 存储:500GB NVMe SSD
中端(约 15000 元):
- CPU:Intel i7-13700K / AMD R7 7700X
- 内存:32GB DDR5 5600MHz
- GPU:RTX 4070 Ti 12GB
- 存储:1TB NVMe SSD
高端(约 25000 元):
- CPU:Intel i9-13900K / AMD R9 7950X
- 内存:64GB DDR5 6000MHz
- GPU:RTX 4090 24GB
- 存储:2TB NVMe SSD
第一步:安装 Ubuntu 22.04
下载镜像
- 访问 Ubuntu 官网
- 下载 Ubuntu 22.04.3 LTS(推荐)
- 校验 SHA256 确保文件完整
制作启动 U 盘
Windows:
- 下载 Rufus
- 插入 U 盘(8GB+)
- 选择 Ubuntu ISO 文件
- 点击 “开始” 制作启动盘
Linux/Mac:
# 查看 U 盘设备名
lsblk  # Linux
diskutil list  # Mac

# 写入镜像(注意替换 sdX)
sudo dd if=ubuntu-22.04.3-desktop-amd64.iso of=/dev/sdX bs=4M status=progress
sudo sync
安装 Ubuntu
- 重启电脑,进入 BIOS(通常按 F2/Del/F12)
- 设置从 U 盘启动
- 选择 “Install Ubuntu”
- 选择语言(建议 English)
- 选择 “Normal installation”
- 选择 “Erase disk and install Ubuntu”(如果是新电脑)
- 设置时区、用户名、密码
- 等待安装完成(约 10-20 分钟)
- 重启并移除 U 盘
首次启动配置
# 更新系统
sudo apt update && sudo apt upgrade -y

# 安装基础工具
sudo apt install -y git curl wget vim build-essential cmake htop net-tools

# 安装 NVIDIA 驱动
sudo ubuntu-drivers autoinstall
sudo reboot

# 验证驱动安装
nvidia-smi
优化设置
禁用不必要的服务:
# 禁用防火墙(开发环境)
sudo ufw disable

# 禁用自动更新(避免打断工作)
sudo systemctl disable apt-daily.service
sudo systemctl disable apt-daily.timer

# 优化文件系统
sudo tune2fs -o journal_data_writeback /dev/nvme0n1p2配置交换空间:
# 创建 Swap 文件
sudo fallocate -l 16G /swapfile
sudo chmod 600 /swapfile
sudo mkswap /swapfile
sudo swapon /swapfile

# 设置开机自动挂载
echo '/swapfile none swap sw 0 0' | sudo tee -a /etc/fstab
第二步:安装 ROS2 Humble
为什么选择 ROS2 Humble?
- 长期支持(LTS):支持到 2027 年
- 稳定可靠:经过充分测试
- 生态完善:大量现成的包和工具
- 社区活跃:问题容易找到答案
安装步骤
# 设置 locale
sudo apt update && sudo apt install locales -y
sudo locale-gen en_US en_US.UTF-8
sudo update-locale LC_ALL=en_US.UTF-8 LANG=en_US.UTF-8
export LANG=en_US.UTF-8

# 添加 ROS2 软件源
sudo apt install software-properties-common -y
sudo add-apt-repository universe -y
sudo apt update

# 添加 ROS2 GPG key
sudo curl -sSL https://raw.githubusercontent.com/ros/rosdistro/master/ros.key \
  -o /usr/share/keyrings/ros-archive-keyring.gpg

# 添加软件源
echo "deb [arch=$(dpkg --print-architecture) signed-by=/usr/share/keyrings/ros-archive-keyring.gpg] \
  http://packages.ros.org/ros2/ubuntu $(. /etc/os-release && echo $UBUNTU_CODENAME) main" | \
  sudo tee /etc/apt/sources.list.d/ros2.list > /dev/null

# 安装 ROS2
sudo apt update
sudo apt upgrade -y
sudo apt install ros-humble-desktop -y
sudo apt install ros-dev-tools -y

# 配置环境
echo "source /opt/ros/humble/setup.bash" >> ~/.bashrc
source ~/.bashrc

# 验证安装
ros2 run demo_nodes_cpp talker
# 在另一个终端
ros2 run demo_nodes_cpp listener
配置 ROS2 工作空间
# 创建工作空间
mkdir -p ~/embodied_ws/src
cd ~/embodied_ws

# 初始化 colcon
colcon build

# 配置环境
echo "source ~/embodied_ws/install/setup.bash" >> ~/.bashrc
source ~/.bashrc

# 验证
echo $ROS_DISTRO  # 应该输出 humble
安装常用 ROS2 包
# 可视化工具
sudo apt install ros-humble-rviz2 -y
sudo apt install ros-humble-rqt* -y

# 机器人描述
sudo apt install ros-humble-urdf -y
sudo apt install ros-humble-xacro -y

# 导航
sudo apt install ros-humble-navigation2 -y
sudo apt install ros-humble-nav2-bringup -y

# 仿真
sudo apt install ros-humble-gazebo-* -y

# 控制
sudo apt install ros-humble-ros2-control -y
sudo apt install ros-humble-ros2-controllers -y

# 工具
sudo apt install ros-humble-teleop-twist-keyboard -y
sudo apt install ros-humble-robot-state-publisher -y
第三步:安装 Isaac Sim
方法一:使用 pip 安装(推荐)
# 创建 conda 环境(推荐)
conda create -n isaac python=3.10 -y
conda activate isaac

# 安装 Isaac Sim
pip install isaacsim==4.2.0

# 验证安装
isaacsim --version

# 启动 Isaac Sim
isaacsim
方法二:使用 Omniverse Launcher
# 下载 Omniverse Launcher
wget https://omniverse-launcher-prod.s3.us-east-2.amazonaws.com/omniverse-launcher-Nvidia-1.0.0.AppImage

# 添加执行权限
chmod +x omniverse-launcher-*.AppImage

# 运行
./omniverse-launcher-*.AppImage
然后在 Launcher 中:
- 登录 NVIDIA 账号
- 进入 “Exchange” 页面
- 搜索 “Isaac Sim”
- 点击 “Install”
配置 Isaac Sim
# 创建缓存目录
mkdir -p ~/.local/share/ov/cache

# 配置环境变量(可选)
export ISAAC_SIM_PATH=~/.local/share/ov/pkg/isaac_sim-4.2.0
export PATH=$ISAAC_SIM_PATH:$PATH

# 验证
echo $ISAAC_SIM_PATH
测试 Isaac Sim
# 测试脚本:test_isaac.py
import omni.isaac.kit.SimulationApp

# 启动应用
simulation_app = SimulationApp({"headless": False})

from omni.isaac.core import World

world = World()
world.scene.add_default_ground_plane()
world.reset()

print("Isaac Sim 测试成功!")

while simulation_app.is_running():
    world.step(render=True)

simulation_app.close()
# 运行测试
python test_isaac.py第四步:配置 Python 环境
使用 Conda 管理环境
# 创建环境
conda create -n embodied_ai python=3.10 -y
conda activate embodied_ai

# 安装 PyTorch(CUDA 12.1)
pip install torch torchvision torchaudio --index-url https://download.pytorch.org/whl/cu121

# 安装科学计算库
pip install numpy scipy pandas matplotlib jupyter

# 安装机器人库
pip install gymnasium stable-baselines3 ray[rllib]

# 安装开发工具
pip install black flake8 pytest ipython

# 安装可视化
pip install plotly open3d

# 安装 ROS2 Python 包
pip install empy==3.3.4
pip install lark
pip install numpy-quaternion
配置 Jupyter Lab
# 安装 Jupyter Lab
pip install jupyterlab

# 生成配置
jupyter lab --generate-config

# 编辑配置
nano ~/.jupyter/jupyter_lab_config.py
修改以下内容:
c.ServerApp.ip = '0.0.0.0'
c.ServerApp.port = 8888
c.ServerApp.open_browser = False
c.ServerApp.allow_root = True
c.ServerApp.notebook_dir = '~/projects'
# 启动
jupyter lab
# 访问:http://localhost:8888第五步:创建工作空间
项目结构建议
~/projects/
├── embodied_ws/          # ROS2 工作空间
│   ├── src/
│   │   ├── robot_description/
│   │   ├── robot_control/
│   │   └── robot_navigation/
│   ├── build/
│   ├── install/
│   └── log/
├── isaac_projects/       # Isaac Sim 项目
│   ├── basic_examples/
│   ├── robot_sim/
│   └── training_envs/
├── ml_projects/          # 机器学习项目
│   ├── data/
│   ├── models/
│   └── notebooks/
└── scripts/              # 通用脚本
    ├── setup_env.sh
    └── utils.py
初始化项目
# 创建项目目录
mkdir -p ~/projects/{embodied_ws/src,isaac_projects,ml_projects,scripts}

# 初始化 Git
cd ~/projects
git init
git config user.name "Your Name"
git config user.email "your.email@example.com"

# 创建 .gitignore
cat > .gitignore << 'EOF'
__pycache__/
*.py[cod]
*$py.class
*.so
.Python
build/
develop-eggs/
dist/
downloads/
eggs/
.eggs/
lib/
lib64/
parts/
sdist/
var/
wheels/
*.egg-info/
.installed.cfg
*.egg
*.manifest
*.spec
pip-log.txt
pip-delete-this-directory.txt
htmlcov/
.tox/
.coverage
.coverage.*
.cache
nosetests.xml
coverage.xml
*.cover
.hypothesis/
.pytest_cache/
*.log
local_settings.py
db.sqlite3
instance/
.pytest_cache/
.coverage
.coverage.*
.mypy_cache/
.pytest_cache/
*.so
*.dylib
*.dll
*.class
*.app
*.apk
*.ipa
*.o
*.obj
*.pyc
*.pyo
*.pkl
*.pickle
EOF
常见问题
CUDA 版本不匹配
问题:PyTorch 无法使用 CUDA
解决:
# 检查 CUDA 版本
nvidia-smi  # 查看驱动支持的 CUDA 版本
nvcc --version  # 查看安装的 CUDA 版本

# 安装匹配的 PyTorch
# CUDA 11.8
pip install torch --index-url https://download.pytorch.org/whl/cu118

# CUDA 12.1
pip install torch --index-url https://download.pytorch.org/whl/cu121

# 验证
python -c "import torch; print(f'CUDA: {torch.cuda.is_available()}')"
Isaac Sim 启动失败
问题:Isaac Sim 无法启动或崩溃
解决:
# 清理缓存
rm -rf ~/.cache/ov/
rm -rf ~/.local/share/ov/

# 重新安装
pip uninstall isaacsim -y
pip install isaacsim==4.2.0

# 检查 GPU 驱动
nvidia-smi

# 更新驱动(如果需要)
sudo apt install nvidia-driver-535 -y
sudo reboot
ROS2 节点无法通信
问题:ROS2 节点无法发现彼此
解决:
# 检查网络接口
ros2 multicast receive &
ros2 multicast send

# 配置防火墙
sudo ufw allow 11311  # ROS_MASTER_URI
sudo ufw allow 11311/udp

# 检查环境变量
env | grep ROS
env | grep RMW  # 应该为空或相同

# 重置
unset ROS_DOMAIN_ID
unset RMW_IMPLEMENTATION
内存不足
问题:系统内存不足,程序崩溃
解决:
# 检查内存使用
free -h
htop

# 增加 Swap
sudo fallocate -l 32G /swapfile
sudo chmod 600 /swapfile
sudo mkswap /swapfile
sudo swapon /swapfile

# 清理缓存
sudo sh -c 'echo 3 > /proc/sys/vm/drop_caches'

# 限制 Isaac Sim 内存
export OMNI_MAX_MEM_PER_DEVICE=8192  # MB
Isaac Sim 渲染性能差
问题:Isaac Sim 帧率低
解决:
- 使用性能模式:
isaacsim --/renderer/enabled=true - 降低渲染质量:在设置中调整
- 关闭不必要的视口
- 使用无头模式:
isaacsim --headless - 更新 GPU 驱动
FAQ
可以用 Windows 开发吗?
可以,但有限制:
- Isaac Sim 原生支持 Windows
- ROS2 在 Windows 上支持有限
- 推荐使用 WSL2 + Ubuntu
WSL2 配置:
# 安装 WSL2
wsl --install -d Ubuntu-22.04

# 在 WSL2 中安装 GUI 支持
sudo apt install x11-apps -y

# 测试
xclock
没有 NVIDIA GPU 怎么办?
替代方案:
- 使用 MuJoCo:对 GPU 要求低
- 使用 Gazebo:CPU 渲染
- 云 GPU:AWS、GCP、阿里云
- 升级硬件:购买 RTX 显卡
开发环境搭建需要多久?
时间估计:
- 顺利情况:2-3 小时
- 遇到问题:半天到一天
- 完全熟悉:1-2 周
建议:
- 提前备份重要数据
- 记录每一步操作
- 遇到问题及时搜索
- 必要时求助社区
如何备份开发环境?
方法一:Clonezilla
# 全盘备份
sudo apt install clonezilla -y
# 使用 Clonezilla Live USB
方法二:Conda 环境导出
# 导出环境
conda env export > environment.yml

# 在其他机器恢复
conda env create -f environment.yml
方法三:Docker
# 创建 Docker 镜像
docker build -t embodied_ai:latest .

# 推送到仓库
docker push your_username/embodied_ai:latest
性能优化技巧
1. GPU 优化
# 设置性能模式
sudo nvidia-settings -a '[gpu:0]/GPUPowerMizerMode=1'

# 监控 GPU
watch -n 1 nvidia-smi
2. 内存优化
# 清理缓存
sudo sysctl -w vm.drop_caches=3

# 调整 swappiness
sudo sysctl vm.swappiness=10
3. 磁盘优化
# 使用 tmpfs 加速
sudo mount -t tmpfs -o size=8G tmpfs /tmp

# 定期清理
sudo apt autoremove -y
sudo apt autoclean
4. 网络优化
# 增加文件描述符限制
echo "* soft nofile 65535" | sudo tee -a /etc/security/limits.conf
echo "* hard nofile 65535" | sudo tee -a /etc/security/limits.conf

# 优化 TCP
sudo sysctl -w net.core.somaxconn=65535
sudo sysctl -w net.ipv4.tcp_max_syn_backlog=65535
总结
完成本文的步骤后,你已经拥有了一个完整的 Embodied AI 开发环境:
- ✅ Ubuntu 22.04 系统配置
- ✅ ROS2 Humble 安装
- ✅ Isaac Sim 部署
- ✅ Python 环境管理
- ✅ 工作空间组织
- ✅ 常见问题解决
- ✅ 性能优化技巧
下一步:
参考资源:
系列文章:
- 上一篇:技术栈全景
- 下一篇:Sim-to-Real 基础
- 相关:ROS2 入门